IAS Drupal 7 Sites Documentation
Using Sections
Some sites employ the Paragraphs module to add flexibility by allowing content authors to customize pages through the use of different collections of fields that we call sections.
You may see sections referred to as “paragraphs” on some editing screens and as “sections” on others.
On equipped content types, content authors have the ability to select the types of sections added to the page. Sections can be re-ordered to customize the page.
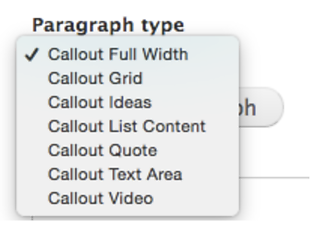
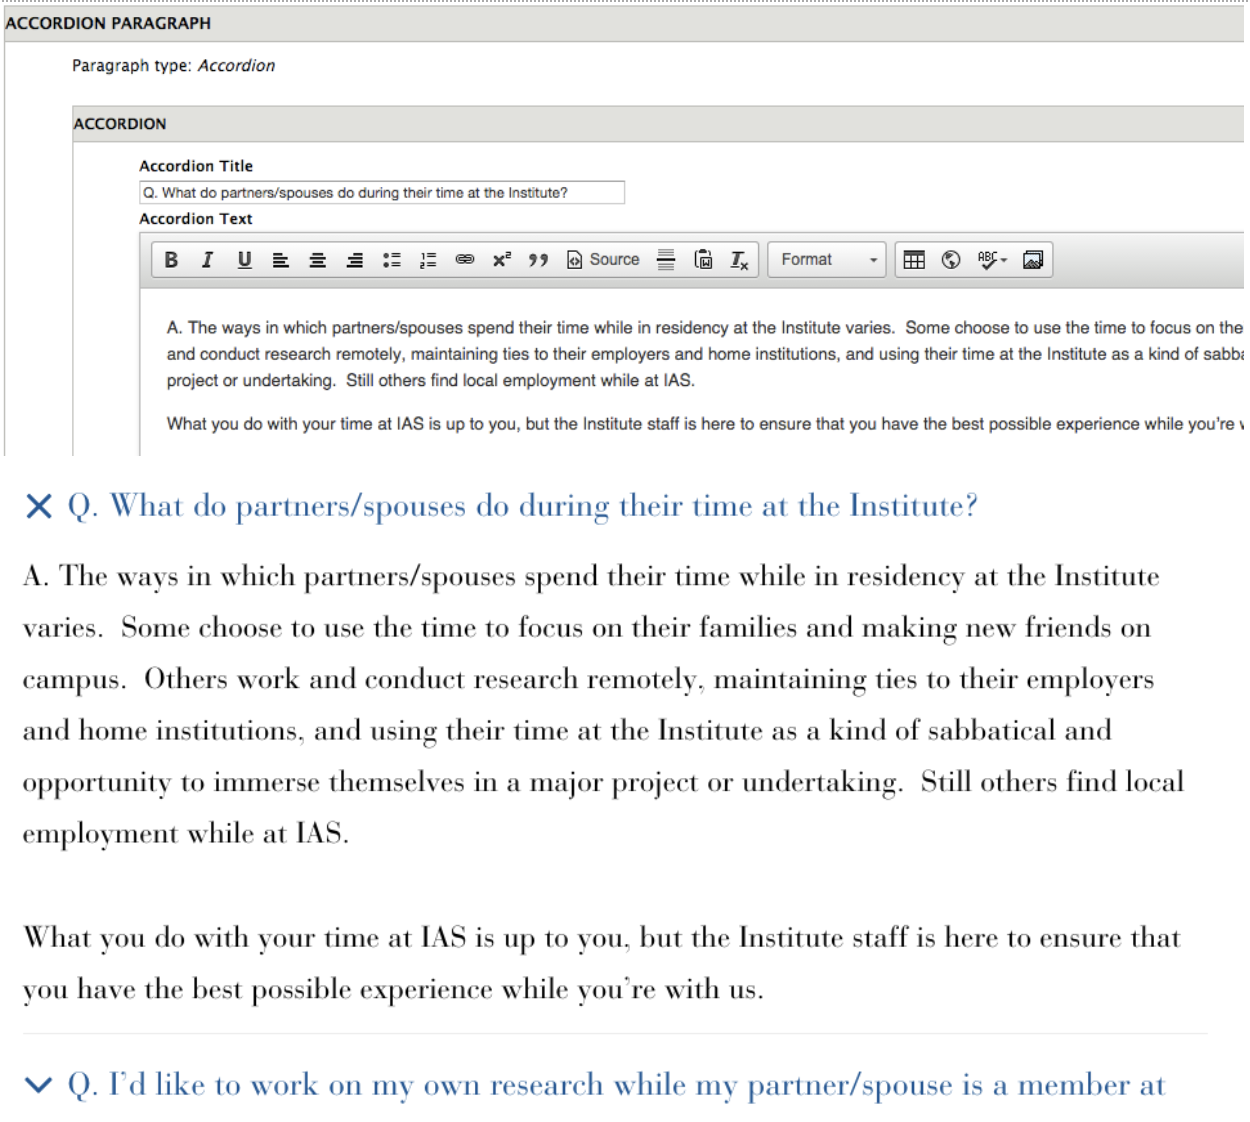
Accordion Section
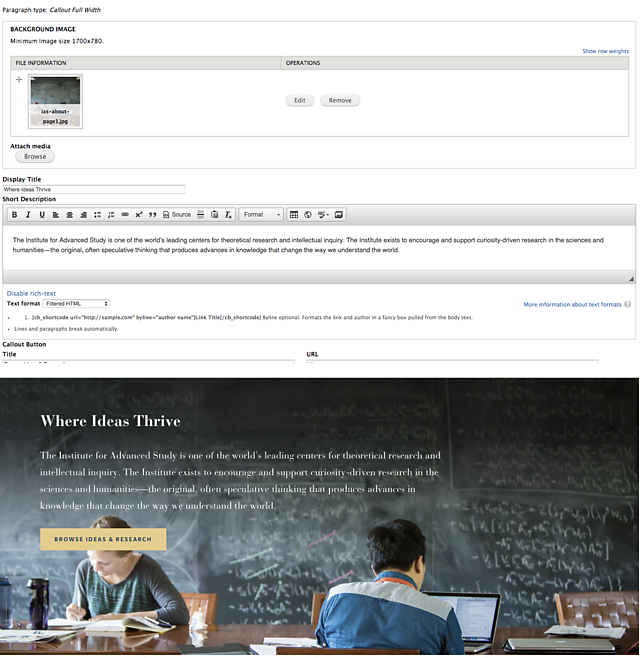
Callout Full Width Section
This section will not display properly on pages with blocks in sidebars.
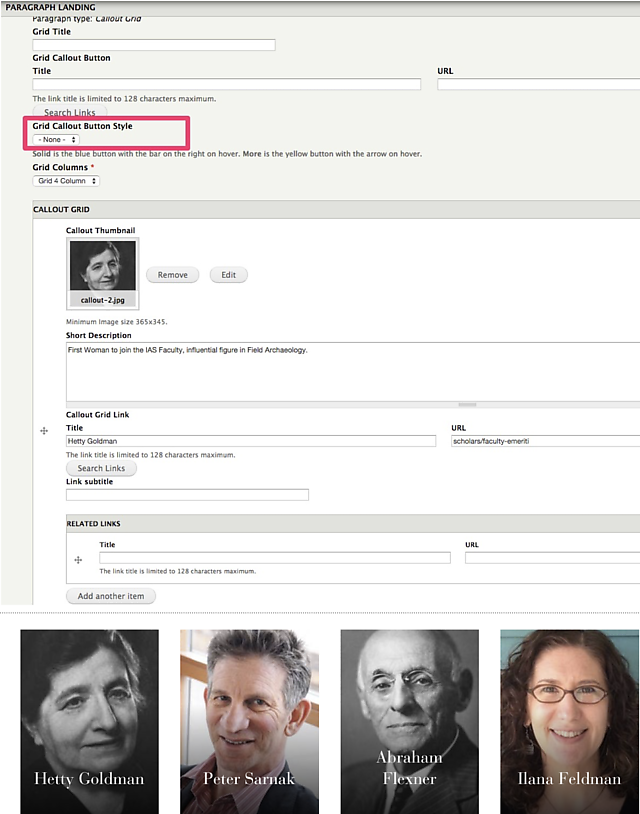
Callout Grid Section
For the Callout Grid there is an additional style button for “Solid” or “More.” “Solid” is the blue button with the bar on the right on hover. “More” is the yellow button with the arrow on hover.
Callout Ideas Section
This feature is exclusive to www.ias.edu.

Callout List Content Section
Begin typing in the Page Reference field to search for pages. A list of results will appear, and you can select one of these results to create a link to that page. The number that appears next to the page title is that page’s unique node ID.
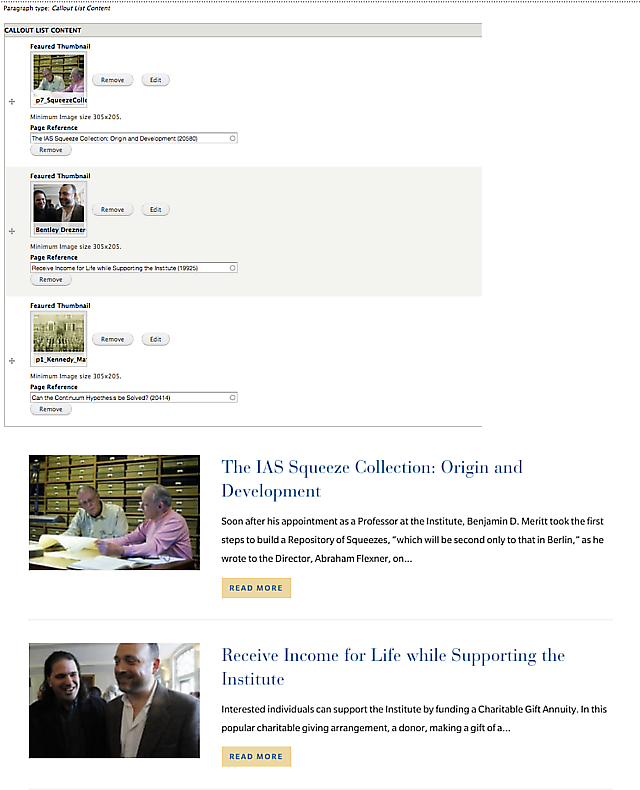
Referenced content must have teaser text for any text to appear in the list. Where to add this text varies depending on content type:
- Basic Page (www.ias.edu), Landing, Webform: Currently there is no support for teaser text.
- Basic Page (not www.ias.edu), Idea: Teaser text is pulled from the body
field. If you want to specify the teaser text, you can edit the field’s summary.
- In the Media, News: Teaser text is pulled from the body field. There is no option to specify the teaser text.
- Stacked Page: Add teaser text in the Teaser Text field.
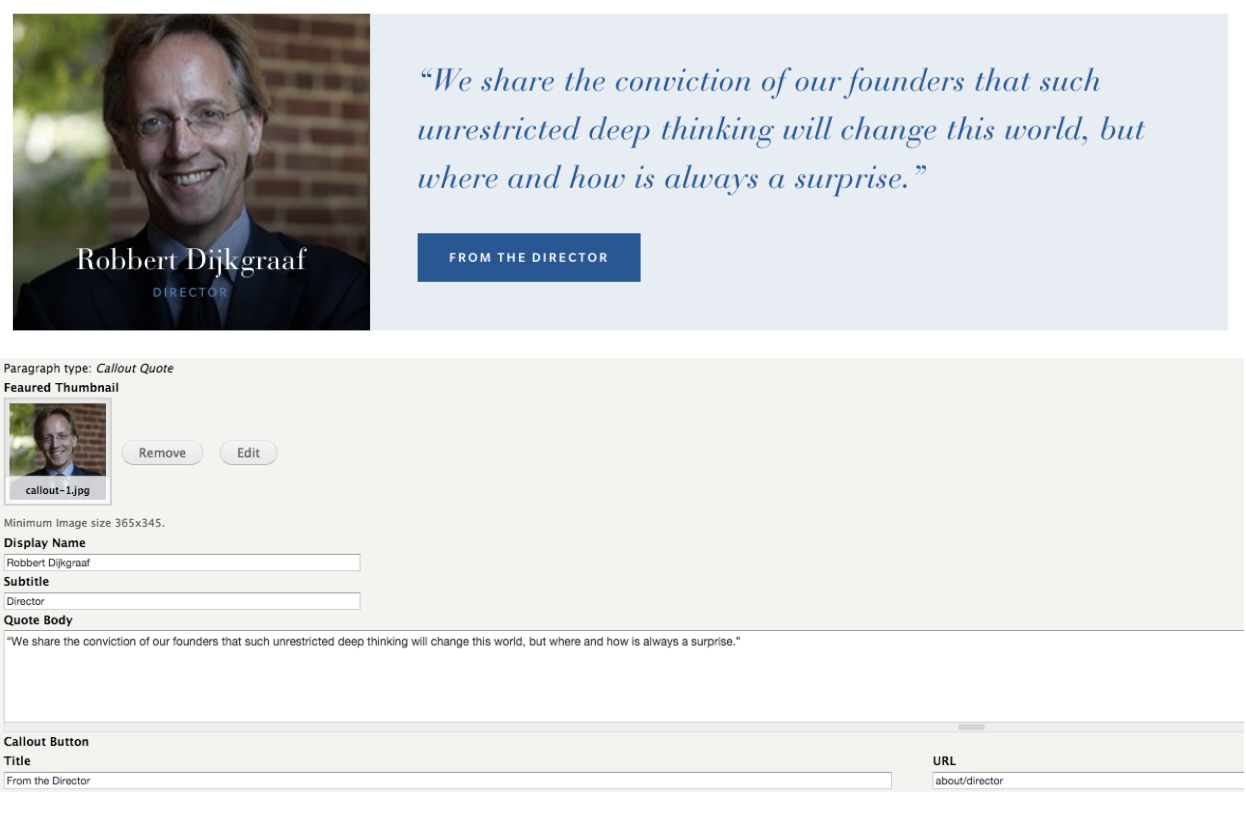
Callout Quote Section
Callout Text Area Section
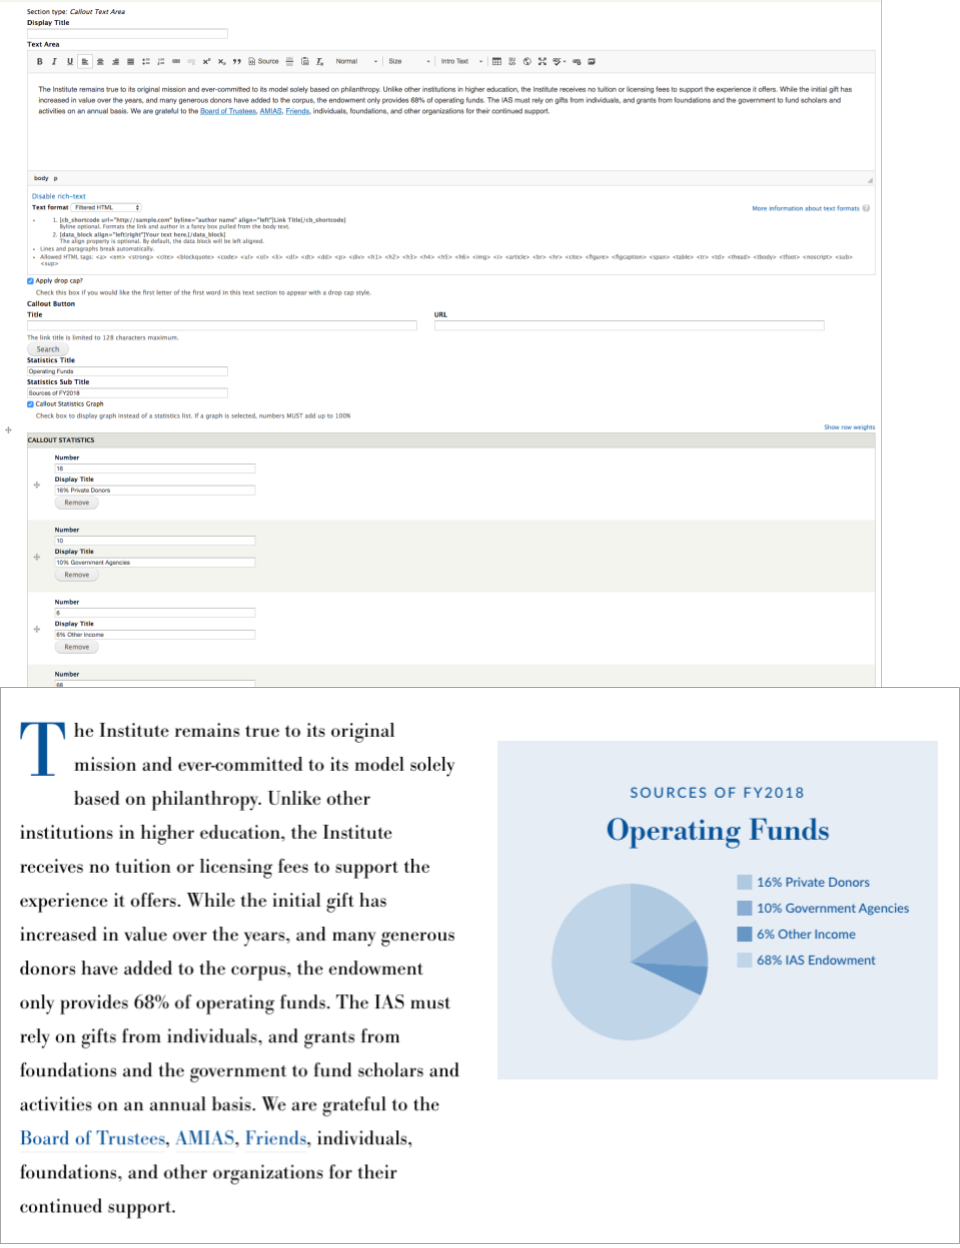
The Statistics Sub Title displays in all caps.
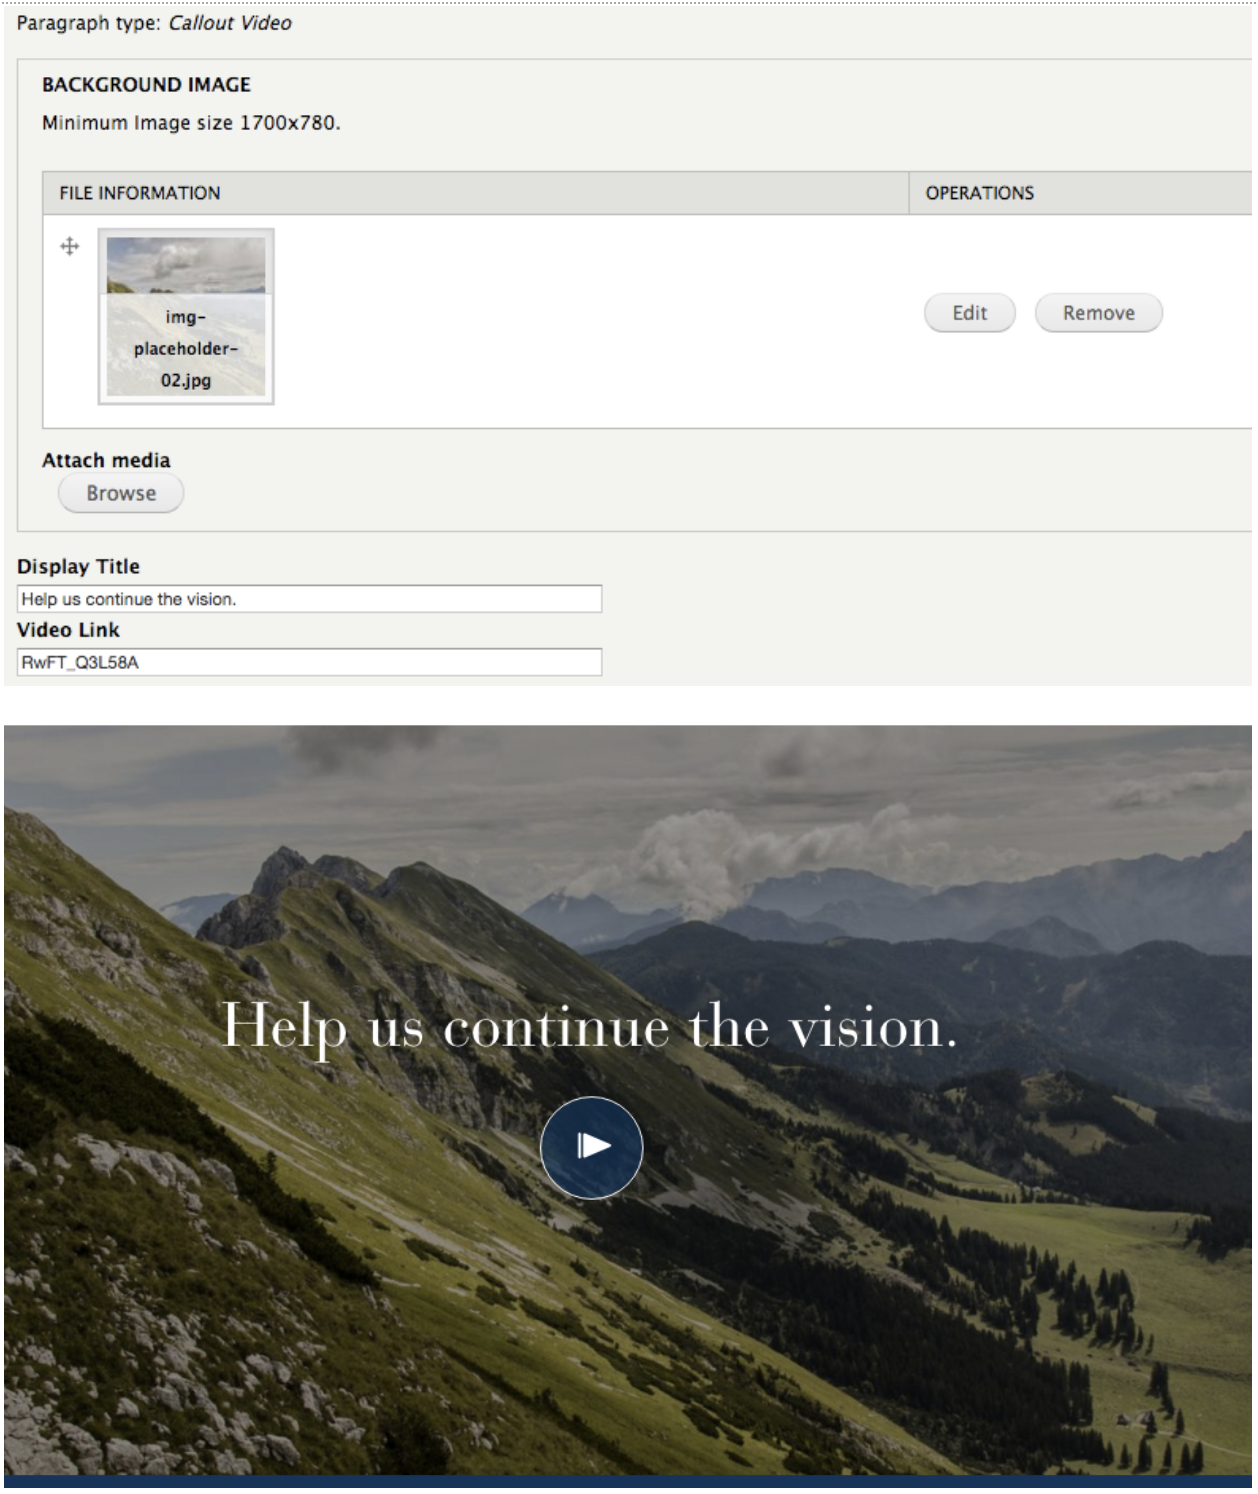
Callout Video Section
This section will not display properly on pages with blocks in sidebars.
Cascading Grid Layout
This feature is exclusive to www.ias.edu.
A dynamically adaptable grid layout such as on the ias.edu homepage.
Contact View Reference Section
This feature is exclusive to www.ias.edu.
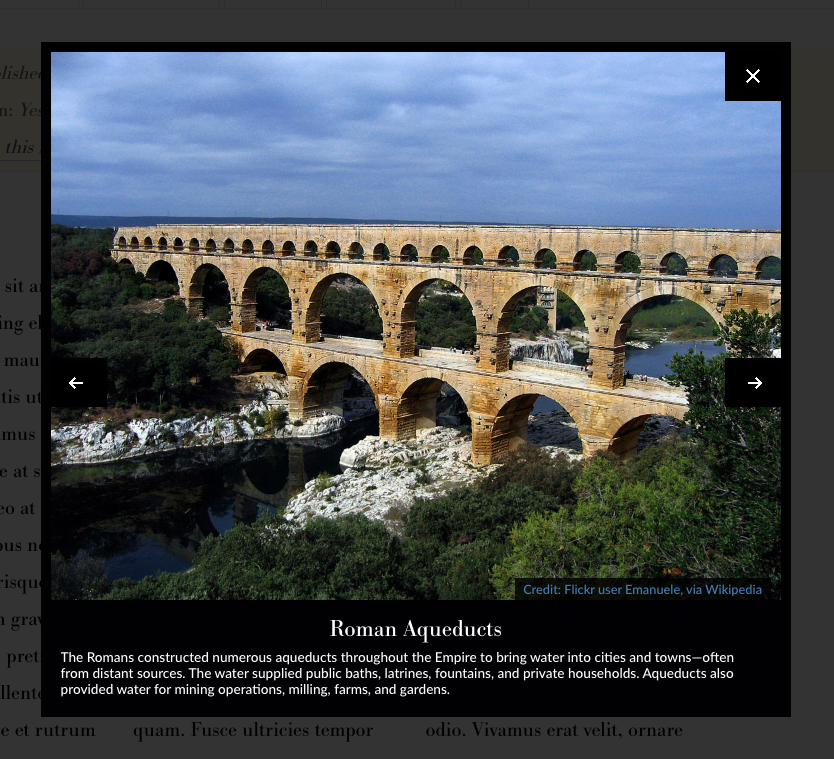
Gallery of Images Section
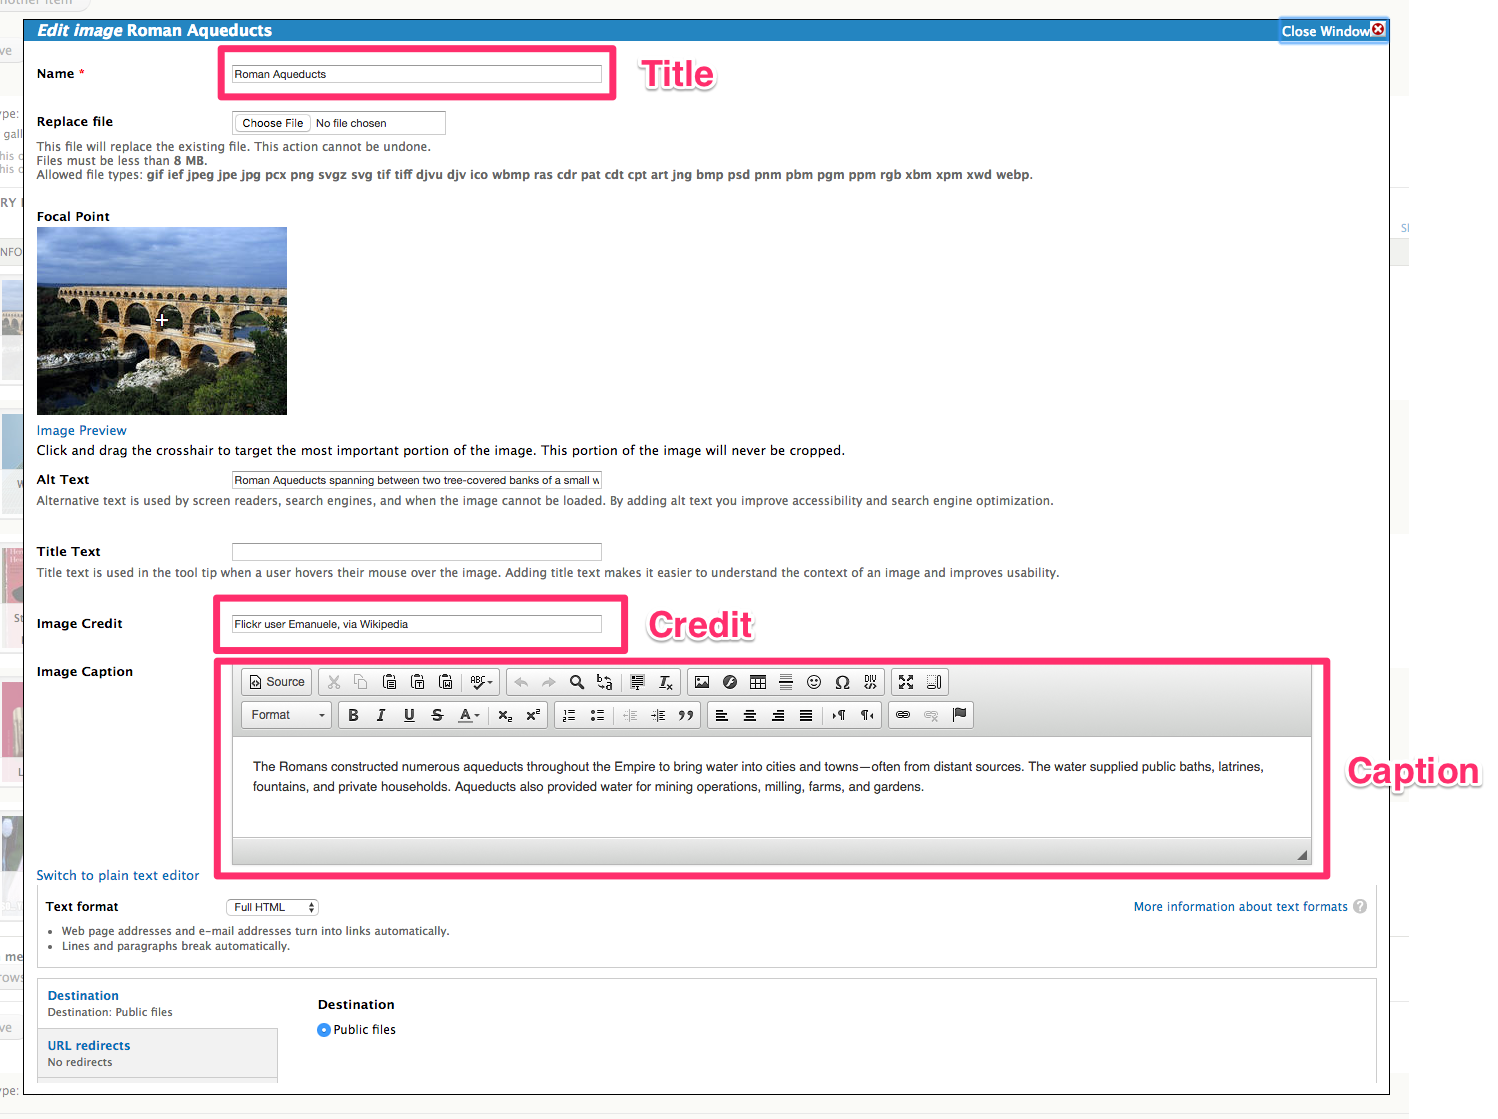
Upload or select any number of images you wish to include in the gallery by pressing the Browse button. Include a title for each image, and optionally include a credit and a caption.
You can optionally select Hide name in gallery? to prevent the image name field from displaying in galleries.
You have the option to initially display the gallery as a single image or as a grid of thumbnails. If you select a grid of thumbnails, you are given the ability select the number of columns in the grid.
Gallery as single image:
Gallery as grid:
An image slideshow will pop up when an image is clicked. You can use the arrows to view the next image in the gallery, and each image is accompanied by the credit, title, and caption you added earlier.
Multi-column Text Section
Add your content as you normally would and select the number of columns it should appear with. As the screen size gets smaller, the columns will progressively collapse from your selected number of columns to two columns on tablet-sized devices and finally to one column on phone-sized devices.
Random Quote Section
This feature is exclusive to www.ias.edu.
This feature will be removed.
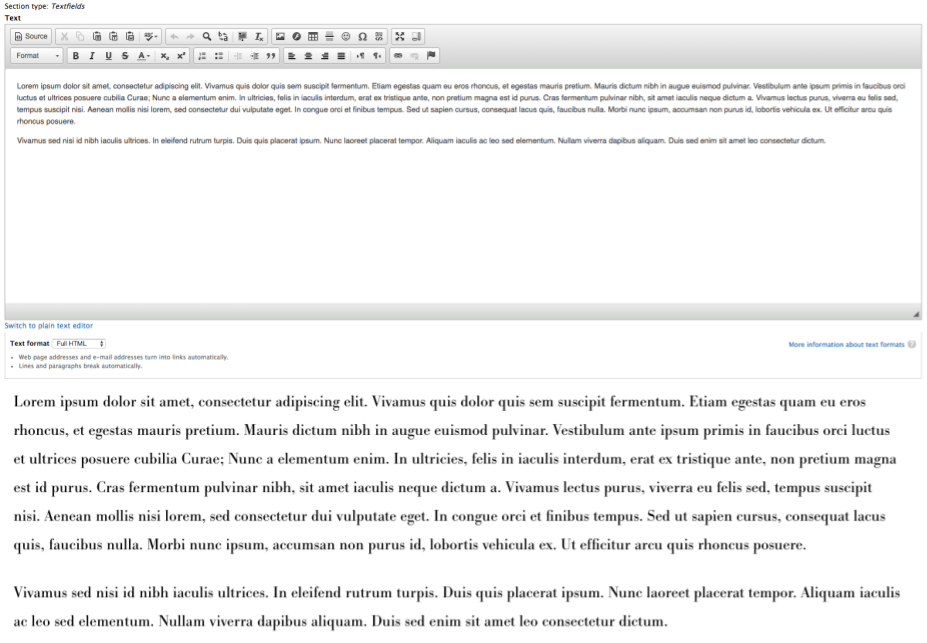
Table Section
There are three ways to create tables using this feature:
- Manually add content.
- Upload a CSV file.
- Copy and paste content.
1. Manually add content
Select the number of columns and rows you want your table to have, then press the Rebuild Table button. Add your content to the table cells. You can update the number of rows or columns at any time. Your content will not be lost when adding rows or columns, but it can be lost if you remove the row or column it is in.

2. Upload a CSV file
This feature requires additional permissions. Ask the site administrator if you need this feature enabled.
If you already have your content in a spreadsheet, you can export that spreadsheet as CSV file and import it into this Section. Select your CSV by in the File upload field and press the Upload CSV button.

3. Copy and paste
This feature requires additional permissions. Ask the site administrator if you need this feature enabled.
Copy the contents of a spreadsheet and paste them into the text box. Select the appropriate Column separator and press the Import & Rebuild button. If your table does not import correctly, paste your content back into the text box and try a different column separator.

Text Area Section
2 Column Blocks Section
This feature is exclusive to www.ias.edu.
Creates two-column layouts on the landing content type
3 Column Blocks Section
This feature is exclusive to www.ias.edu.
Creates three-column layouts on the landing content type